Learn how to create, manage, review, approve and publish events with Attend. We've put together videos for common tasks like creating events, managing registration and publishing events. Plus there's a full user guide covering all of Attend's features.
Overview
Action Center
Creating a new event
1. Event main info
2. Event date and time
3. Choosing a venue
4. Event types and images
5. Event settings
6. Registered events
Approving and publishing
Cancelling and rescheduling
Managing registration and attendance
Zoom Integration
1. How to begin
2. Creating a virtual event
3. Creating a hybrid event
4. The patron perspective
Learn the basics and get more detailed explanations of Attend's features
Create an event
3 mins, 26 secs
It's easy to create events, and for similar events, you can create templates to save you time too. Setting dates and times for repeating events, adding event tags - it's all covered here. ![]()
Registered events
4 mins, 36 secs
Create registered events and set how far in advance patrons can register, how many can register and if you want to have waitlists. See how you can manage registrants and record attendance.![]()
Edit, cancel and reschedule events
2 mins, 19 secs
Learn how to edit events after they have been published. Need to change a time and notify all your registrants or cancel an event because the presenter is ill? Here's how you do it. ![]()
Event venues
2 mins, 51 secs
Most of the time your events will take place in a room or space within a library branch. This is how to set the place where your event is occurring - either as a one off or repeating event in different rooms. And if the event is not in a library location, you can easily add details for external venues too.![]()
3 mins, 3 secs
If you have different levels of creating, approving and publishing, your events can be reviewed and either approved or returned for changes. Here's how it works. ![]()
5 mins, 31 secs
If you have different levels of creating, approving and publishing, your events can be reviewed and either approved or returned for changes. Here's how it works.
Learn the basics of Attend with step by step illustrated guides.
The control panel Events section is where you create and manage your library events. You can set events to be registered and reserve library venues (rooms) for your events.
The Communico events system allows for simple events creation and publication, or a full hierarchical review and approval flow before an event is published. Depending on a user's role and their permissions, they can create, review, approve and publish. A history of all change requests and comments are kept with the event - even after publication.
Users can be set up to create and approve just their branch's events, a group of branches or all events.
The action center shows a list of the events that the user has created, are awaiting review by them, or have changes requested. Events can be reviewed, approved and published directly from the Action Center.
Editors can preview any change requests and then click edit to carry out the amendments.
Approvers can preview, review and approve straight from the dashboard. (There can be a number of levels of approvers)
Publishers can preview, review, approve and publish events straight from the dashboard.

In the Events section, click the New event button then fill in and select options for your new event.
The Title is the main identifier for your event, the Sub title appears after the title. They will show on your website events listing pages and individual events pages, as well as in events widgets, on digital signage and in your App. (Some settings may hide the subtitle for certain widget display options).
Select the Branch Location the event is associated with. (In most cases this will be where the event is taking place, but could be the branch that is organising an event at an external venue). Choose the person responsible for the event from the Event contact list.
Enter the event Description using the text editor. Formatting can be applied, but keep it simple to ensure a consistent look to your events for your users.
A Short description can be added which uses a limited amount of characters. This is a short summary of the event which can be used in place of the full description.

Select a Date and time for your event from the calendar picker and click
If the event is repeated you can just add new dates and times by picking from the calendar and adding. All event instances in the series will be listed next to the calendar.
For regular repeats, choose a start date, then use the dropdown option on the add button to select - Daily, weekly or monthly - and just choose the end date the event should repeat until.

From the Date and venue section, select the venue button and all venues at the branch on the day you have chosen for your event are shown. The time for the event is highlighted and any available venues are shown in green.
Hover or click on the venue image to reveal more details about the venue's capacity and other features.
Click the Available button for the venue you want to reserve for the event. The venue becomes selected and will be reserved.
The Setup and Breakdown time for each venue is added to the start and end time of your reservation but this can be extended. The venue is then reserved for the event time plus the set up and breakdown time.
If your event has multiple dates, you will need to select a venue for each instance of the event.
Scroll through the event counter and choose a venue for each date.
You may have an event which will occur in an area that isn't in the library's list of bookable venues, for instance the library garden or perhaps an external venue.
In these cases, select the External tab for venue location and then enter the details of the venue. This allows event goers to see the information of where the event is taking place in the events listing.
If the event is at an external venue, use their booking system to reserve the venue. Note: The external venue information you enter will be displayed to users, but the event will still be associated with the branch that is running the event.

You can associate the event with an Event type so that it can be filtered by or searched for by your users. Add an event type, or multiple types, into the field. If you have permissions set, you can also add types by just entering the term. It will be added to the list and available to choose for all future events. You can limit event calendars and upcoming events widgets by event type.
You can also associate events with Age groups. This allows you to display events in widgets to particular groups. For instance just Teen events on the teen page of your website.
You can categorize events using Event tags – aka event labels. You can assign an unlimited number of tags to each event and use these tags to group similar events. This allows events to always be discoverable. For instance, an event may have a title that doesn't reflect the type of event it is. Perhaps the event is about dogs and the event title is "My best friend". By adding a tag 'dog' any search for events on dogs, will include this event.
You can upload an image to support your events. The main Event image will be displayed next to the event on the individual event page. (350px is the optimum width for event images. Height can be larger or smaller, but keeping the aspect ratio of your event images the same will give a consistent experience for patrons).

By default as soon as an event is published it will show to the public on your website and in events widgets.
You can delay showing the event by switching the toggle to No and then choose a date in the future when it will appear to the public.
By default all events will display to the public, by switching private event to yes the event will not show to the public anywhere. (The venue where the event is taking place will just show as 'In use' but no other detail)
If an event is set to be Featured, it will be displayed in events widgets with the featured event option checked.
A featured event can be limited to display only at the branch the event is taking place at (using the branch's location information), or marked as global to display in widgets at all locations.

All events can be set so that people have to register to attend. Just switch Allow registration to Yes. (If the event is taking place outside the library and is using a different registration system, switch third party registration to yes and then enter the web link to their registration page)
Registration will open to the public as soon as the event is published. You can delay this and set a time closer to the event. Switch Open registration when published toggle to No, then pick a date.
Choose how near to the event you want Registration to close.
Enter the maximum number of people that can attend the event. (Make sure the venue you reserve has the capacity).
You can choose to allow registrants to be added to a waitlist if the maximum number of attendees has registered. Registrants and those on the waitlist can be managed in the registrants' section.

When you have a series event with multiple dates, you have the option to enable Series Registration. This will require registrants to register for all remaining dates in the series if they want to register at all. Leaving this unselected will allow patrons to register for any individual dates from the series.
Additionally, enabling Whole Series Registration Only will mean that patrons can only register for the entire series, they are unable to register midway through the series, or for certain dates only.
Remember to save any changes you have made.

An event’s status is always visible and can be in one of four states indicated by the color icon.

After the event has been created and saved, click the review button. A summary of the event will appear which can be reviewed.
The creator of the event can then submit the event for review by clicking the Submit button. The history is updated and the event moves along for review and approval.
Once sent for approval, the event is locked, but can be recalled for editing by the creator and then resubmitted for review.

Click the review button. A summary of the event will appear which can be reviewed.
After reviewing, the event can be approved by clicking the Approve button.
(There is also an option to send the event back if the approver wants the creator to make any changes. The event creator will then be notified of the change request in their Action Center, can edit the event and submit again for review.)

Click the review button. A summary of the event will appear which can be reviewed.
Once the event has been approved, a Publish button is available to allow publication.
If a user has publisher permissions and they create the event, they can review, approve and publish the event straight after saving.
Publishers are notified of any action they need to take in the Action Center on the dashboard. Publishers can quickly preview events and approve from the Action Center or from within an individual event. If necessary, the publisher can also send the event back to the event creator if there are changes required.
Events can be reviewed, approved and published from the Action Center, from the events listing page or from the individual event page.
After an event has been published it is locked. The content can be edited, but to change the time, date or venue the event has to be rescheduled.
There may be more than a single approval stage set up for your library. If this is the case, then the event moves through the approval levels until it gets to the publisher
(If an event needs to be changed after it has been reviewed and approved, it can be recalled by any person in the event chain. The event would then need to be reviewed again by any groups further up the chain).

An event can be cancelled after it has been published. Cancelled events appear in listings with the original and updated times.
On the events listing page, find the event and from the more button, select cancel event (or cancel event series if you want to cancel all instances of the event in a series).
Confirm that you want to cancel the event. You can add a reason for cancelling which will appear in event listing. If it’s a registered event, any registrants will be notified automatically if they provided an email address when registering.

On the events listing page, find the event and from the more button, select reschedule event.
Choose a new time and/or date for the event.
Amending an event will automatically cancel the venue associated with it. Even though the rescheduled/updated event may be taking place at the same venue, you will need to reselect the venue every time.
When you reschedule or update an event, any existing waitlist and registrants will be automatically moved over to the new timeslot. Check 'notify registrants where possible' to send a notification email to those registrants alerting them of the change and giving them the new scheduling details. Please be aware that this email will only be sent to those registrants who have a valid email address tied to their registration, and will not be available when the 'update only' option is used.
You can enter a reason for rescheduling which will appear in in the notification email for registrants.
Rescheduling an event technically creates a new event at the new time/date/venue. The old event will appear as a 'ghost' in the calendar, clearly marked as 'rescheduled', and pointing to the new event. If you want to make scheduling changes without marking the event as 'rescheduled' you may consider using the 'update only' option, which you can read about below.
To make changes to the time, date or venue of a published event without rescheduling it, you can check the 'update only, do not mark as rescheduled' box. Checking this will make the changes to the time, date or venue, but will not fully reschedule the event. This means that the event will not be marked as 'rescheduled' in the calendar, a 'ghost' event will not appear in the old calendar position, and registrants will not be notified of the changes.
Whether fully rescheduling or just updating, finish the process by clicking 'Reschedule Event' and confirming.
On the events listing page, find the event and from the more button, select unpublish event.
Confirm you want to unpublish the event (If it’s a series event the entire series will be unpublished)
Unpublishing removes the event from any public listings.
On the events listing page, find the event and from the more button, select delete event. ( An event can only be deleted when it's status is draft).


Registrants and attendance details can be managed for events from the event listing page.
Find the event and click the attendance button.
A pop up will appear where you can view and add registrants of registered events.
New registrants can be added here too. If the event has a waitlist, then registrants can be removed and promoted from the waitlist.
If you have enabled the automated waitlist option, waitlisted patrons will automatically be promoted to registered if a space becomes available. Patrons are notified of their promotion via email, so if they have not given an email address upon joining the waitlist, they will not be automatically promoted, but will be skipped over.
For any event there is the option to enter attendance numbers and details of attendees after the event has taken place.

Within Attend, you may now create four different types of events:
An event held in-person without a virtual option.
An event that uses multiple physical rooms from the same branch.
An event that is held both online and virtually.
An event that has been created that uses only virtual rooms.
These events can be created in the same way as any other event would be. You will select your date and time followed by clicking the venue button.

The virtual room will be distinguished by the Zoom icon appearing next to the room name, clearly indicating it is a virtual space.
Then you will proceed with adding all of your event details just as you have always done, including enabling registration if you would like patrons to be able to sign up for your event.
![]()
Once you’ve selected your registration settings, you will be presented with your Virtual Event settings. Each setting can be individually turned on or off on an event-by-event basis.
This setting is separate from the physical room number, and will control how many virtual attendees can attend the event
When this is enabled, the host will automatically have video enabled if their device supports it.
Like the host rule, if the participants device supports video it will be started automatically when they join the room.
When this is enabled, the participant will be muted when entering the room.
When this is enabled the Zoom lobby will be enabled allowing participants to wait for the host.
When this is enabled participants will be able to join the room at any time.
There are 3 settings here, None, Local & Cloud. If either of local or cloud are set, the meeting will automatically be recorded when the host joins the meeting.
This can be set to support both Telephone and PC audio, PC only or Telephone only.
As an additional layer of security to stop patrons from attending events that they have not registered for; a unique password can be set here and will be associated with the event link that is generated for patrons.

Once you’ve completed entering all of your event information you may proceed with your normal event approval workflow.
Please note: With virtual and hybrid events, the Zoom meeting will only be created when the event has been published. If the event is in draft status, the Zoom actual meeting will not be created, but the room will be held so no one else can book it while your event makes its way through the approval process. Additionally, multiple registrant types are not supported in virtual or hybrid events.
Hybrid evenst are events that have both a physical library room and a virtual room associated with it. When creating a hybrid event, you will select both a physical and virtual space using the venue button.
Then, you will follow the same steps outlined above to complete the creation of your event. You will find that attendee numbers are controlled by separate fields, so you have control of the total number of allowed registrants for each room type.
Once you’ve completed entering all of your event information you may proceed with your normal event approval workflow.
Please note: With virtual and hybrid events, the Zoom meeting will only be created when the event has been published. If the event is in draft status, the Zoom actual meeting will not be created, but the room will be held so no one else can book it while your event makes its way through the approval process. Additionally, Multiple registrant types are not supported in virtual or hybrid events
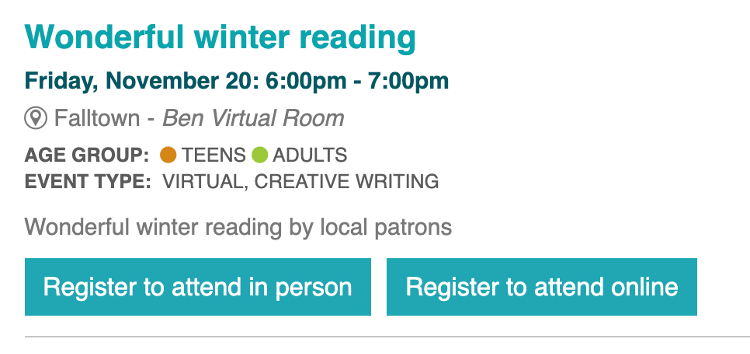
From the patron side, there is a clear distinction between an in-person registration and a virtual registration, allowing them to decide which type of registration they prefer.