When you add a content block, click into it to start adding your content using the text editor.
To add text, select a content block, and click inside to start typing. A text editor will appear, allowing you to add your own text. You can also paste in copied text, but any formatting it has will be stripped out. Text can be styled using the built in formatting options in the toolbar. Based on your themes, you can select headings, text styles, set alignments etc.

Undo - Undo last action
Redo - Redo last undone action
Cut - Cut selected content to clipboard
Copy - Copy selected content to clipboard
Paste - Paste content from clipboard
Paste as text - Clicking this will toggle on/off plain text mode for the Paste function (notice the checkmark when toggled on). In plain text mode, content will be pasted as plain text, and won't include images or formatting.
Select all - Select all content in the block
Navigation - Inserts a shortcode which will place a link to the navigation you have created for the site. The navigation will be styled based on the settings you have entered in the theme the site is using.
Link - Inserts a hyperlink at the selected location. Enter the URL you would like to link to, and the text to display on the page. 1) If you are linking to an anchor within your page, you will first need to insert the anchor (see below). You will then be able to pick that anchor ID from the Anchors dropdown. 2) The anchor will not be available in the Anchors dropdown if the target anchor is in a separate text editor. You can then enter the anchor ID as the URL with a pound sign ‘#’ prefix.
Add a title for accessibility, which will show when you hover over the link. Set the target to either open the URL in the same window or in a new window.
Anchor - Inserts an anchor at the selected location. Create an Anchor ID to label this anchor. You can then link to it using the Insert Link feature (see above).
Media - Inserts or embeds an image or video file into a content block. Select the appropriate tab on the Insert/Edit Media popup.
Horizontal line - Inserts a horizontal line at the selected location, to break up your content.
Bold - Embolden the selected text (sample)
Italic - Italicize the selected text (sample)
Underline - Underline the selected text (sample)
Strikethrough - Cross out the selected text with a strikethrough (sample)
Superscript - Make the selected text superscript (sample)
Subscript - Make the selected text subscript (sample)
Formats - A list of formatting options to apply to your text can be found here. Choose from a range of headings (based on your page theme). The inline options are as listed above, with the adddition of a code style option. Under blocks you can apply a default style to an entire block of text: you can produce normal styling using the paragraph setting, or format your text as blockquotes, div or pre. Under alignment, you can set the alignment of the text to left, center, right or justified. Under visibility styles, you can choose to hide selected text on certain screen sizes. Selecting button will insert a button at the selected location which you can type text directly onto. Selecting image left or image right will align a selected image to the left or right of the block.
Clear formatting - Clear any formatting applied to the selected text, and return it to normal paragraph style.
Table - To add a table to your content block, hover over the gridand move the cursor to highlight the desired number of cells. Click to create a table of those dimensions and insert it into your content block. You can manually resize the cells by clicking the edge and dragging. Click into a cell to enter your content.
Table properties - First, select your table to enable this option. Table properties, under the General tab, allows you to determine the width and height of your table, add spacing, padding and borders, enable a caption (a text box will appear above your table) and set alignment. Under Advanced settings, you can also set styles, border color and background color.
Source code - Here is where you can view and manually edit the html code of the block.
Insert file - Shortcut to the Media file finder, allowing you to browse or upload a file and insert it at the selected location
Undo - Undo last action
Redo - Redo last undone action
Formats - A shortcut to the formatting options including headings, inline styles and block styles. You can learn more about custom inline and block styles further down this page.
Bold - Embolden the selected text
Italics - Italicize the selected text
Align left - Left align the selected block of text
Align center - Center align the selected block of text
Align right - Right align the selected block of text
Justify - Justify the selected block of text
Bullet list - Select a bullet point style to create a bulleted list
Numbered list - Select a number style to create a numbered list
Decrease indent - Decrease the indent for the selected block of text
Increase indent - Increase the indent for the selected block of text
Insert/edit link - A shortcut to insert a link to a URL or anchor
Anchor - A shortcut to insert an anchor at the selected location
Insert/edit image - Insert an image. Click the source icon to upload an image or browse Media and select an image. Give the image a description and/or title for accessibility. Define the required dimensions. Select constrain proportions to retain the original proportions. Check caption to produce a text box below the image.
Text color - Change the color of the selected text. Choose a preset color, or create a custom color using the palette or a hex code.
Background color - Change the background color of the selected text. Choose a preset, or create a custom color using the palette or a hex code.
To add an image, select a content block, and click inside to place your cursor where you want the image to appear.
On the text editor toolbar, click the insert image icon. On the pop up, click the Source icon, which will take you to the Media Manager.
Either select an image you have already uploaded, or click Upload, then Local machine, to browse your computer and select a file to upload.
Note: Make sure that the images you upload are of a suitable size and resolution. If not, performance of your site could be affected and pages will be slow to load. Images are made up of pixels, and the more pixels, the larger the file size will be. You need to use images suitable for screen display on your website. An image 1200px wide at 72 dpi will generally be crisp enough to display on your pages. Images with higher resolutions and larger sizes will look the same, but will take longer to load.
You can easily change the size of an image you have uploaded if it is too large. This can be done within the Media Manager.
Select Media in the control panel side navigation.
Upload your image, or find it in the Media Manager.
Select your image, and click Manage.
Select Edit in the dropdown
Here you can change the size of the image, and make any additional edits, including cropping, adjusting color and contrast, adding filters, etc.
Apply your changes and save. When you save, you can choose to either overwrite your image with the changes, or create a copy of it with a new name.
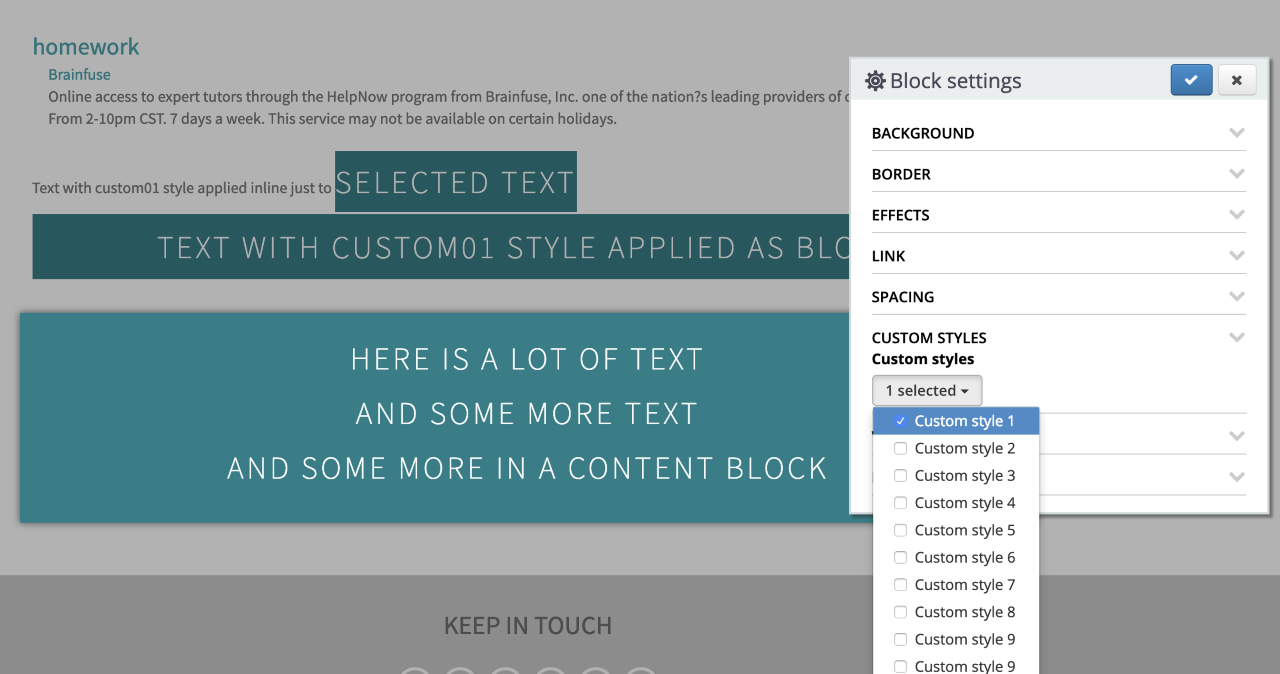
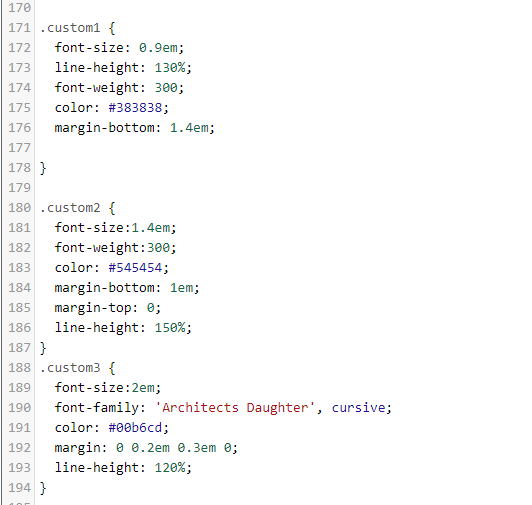
There are 10 custom styles available, which you are able to define in the custom CSS of your chosen theme, with your desired styling attributes. They can then be applied directly from the text editor or from the block settings options.
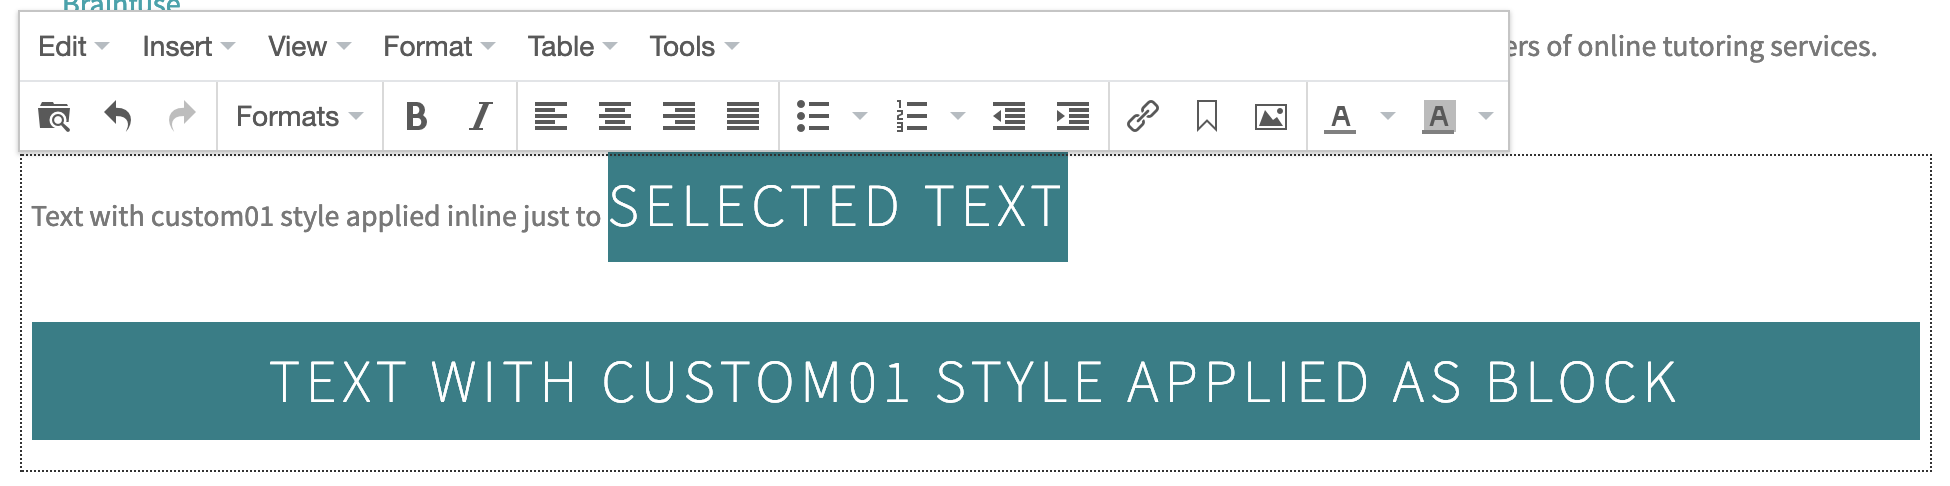
The custom styles can be selected from the Formats menu of the text editor.
Select an inline style if you want only the highlighted text to be styled.
Select a block style if you want it to apply to the entire block or tag.
Custom block styles can also be applied via the block settings menu, accessed through the burger menu in the block's header bar.